Audio-Visual Equipment and a DIY Subwoofer for a Dedicated Exercise
Room
David L. Debertin
The Flat Panel Set
One day I decided that my exercise program and my happiness would benefit from a top flat-panel TV set instead of the Emerson. I measured the cabinet I had, and concluded that a 32 inch flat panel would fit the top of the cabinet where the Emerson had been sitting without having to rearrange the room at all. So I shopped around for a 32-inch flat panel, read Consumer Reports etc and ended up purchasing a Panasonic 32-inch LCD. This is a really great set. Initially I connected the sound to the vintage gear, but decided a modern 2.1 system might be more fun.

The room and placement of the exercise equipment do not lend themselves very well to a 5.1 system. Besides, except for the sub, I had equipment that would work well with a 2.1 system not being used. These included one of the last-generation digital “T” amps, whose output would be great in the 11 x 12 ft room, and a couple of small Radio Shack/RCA speakers I had recently rebuilt after an unfortunate incident involving an old receiver that had unfortunately decided to send 60 cycle AC out of its left speaker terminal. The two replacement woofers are similar to the old, but I also put in a better capacitor. They sound about like they always did, although given their size they do not produce a lot of deep bass. By plugging the T-amp into the headphone jack of the flat panel, I replace the built-in speakers with the T-amp/RCA speaker combination. This is an improvement over the still smaller speakers built into the panel, but I still need deep bass.

So what to do? Obviously a subwoofer was in order. I shopped around looking for a pre-assembled small subwoofer at a reasonable price. Unfortunately, the ones I found either looked really cheap or were 1 cubic ft (or larger) and neither seemed quite right. So, having been at a series of DIY events where builders were singing the praises of the little 5 ¼ and 6 ½ inch Tang Band Subwoofers, I decided that I should try building one using one of these drivers along with a small subwoofer amplifier.
Building the
Subwoofer
My initial thought was to simply look in the Parts Express (PE) catalog for the Tang Band Subwoofers and follow the plan exactly, incorporating one of the small sub amps as well. The 5 ¼ inch Tang Band subwoofer with the 9.25 mm Xmax PE part number 264-831 (huge for a driver that size) was on sale ($19) and so was the 25 sub amp PE part number 300-782 was on sale as well ($32). The catalog design called for a 0.4 cubic foot box and two 2-inch diameter ports so I placed my order for the parts including the 260322 2-inch ports.
Subsequently, Pete Schumaker on the tech board did a little modeling for me and concluded that the 0.4 cubic foot box was a bit small and led to a response peak followed by a rapid dropoff (Thanks, Pete!). Further, the twin ports made no apparent sense at all in the modeling. What was needed was a single, longer port and a bigger box.
It was time to dig out WinISD and do some box modeling myself. I wanted to keep the sub of moderate size, and I had four pieces of scrap MDF 13 ½ “ x 17”. What combination of box size and port length would work the best given the scrap MDF I had?
In modeling in WinISD I settled on a 37 Hz tuning frequency and a 16.1225 liter (0.57 cubic ft) volume. That worked out to a 9.17” port length. Here is the curve WinISD produced with that tuning. That led to a nearly flat curve with just a slight peak (less than 1 db rise as modeled) at 40 Hz. Good enough.

But now I needed a 9.17 inch port and I had two 5-inch ports. The trick, of course, was to saw off the flange on one of the five inch ports I had purchased, and glue the manufactured edges together using gel quick dry superglue. That stunt worked like a charm. Here is a photo of the single port I created.

The next step was to cut out the MDF I needed on my table saw. I have assembled many pieces of knockdown furniture, and usually when I saw a project out there are particular ways in which the project will fit together squarer and truer. So I Identified the ways the pars fit together best, and put letters to match the parts correctly. Here is a shot of the box layed out with parts in the “best fit” locations.

I had been shopping in the dollar store the other day, and I ran into some $100 sets of four 90 degree blackest, so I bought a couple sets, thinking they might come in handy on this project for initial lineup. Generally I like to assemble speakers using screws and latex caulk rather than liquid nails or similar, as that permits disassembly at some future point in time. I caulked all the MDF contact points and then did initial lineup using the metal brackets. After that, the pilot holes, countersinking and screws are added. Here is a photo of how the brackets were used to improve the assembly.

It was smart to cut out the holes for sub and port before assembly. I had recently picked up a hole saw kit at Harbor Freight that included a 5-inch saw and I wanted to try that for cutting the sub hole (slightly larger than the “B” dimension of 4.75” . Also the 2 ½ inch saw in the kit was only slightly larger than the 2” inside diameter port. Both of these could be made to work.

This view shows the amp and amp cutout using a jig saw to cut out between four ½ inch drill holes.

At this point it was time for a test run. The sub will be disassembled, sanded and made leak free after the test run is complete.

Here is a test run showing the sub in MDF and the cardboard mockup. With the exception of the port change they are remarkably similar.

The weather had improved and I could move to the spare garage. I disassembled the sub and sanded the box down. I decided to use the other four 90 degree metal brackets I had to square the front rackets and support a center MDF brace.
My Sears belt sander is my favorite tool for smoothing MDF joints. I decided to use rope caulk to seal the joints along the bottom (top in this photo).

A very sturdy box at this point!


I found a set of disposable foam rollers and handle at the dollar store. These were perfect for applying several coats of black latex lacquer paint. You can see one of the rollers in the photo below.

This box can be easily cut from a 2 x 4 ft sheet of ¾ inch thick MDF available at Home Depot.
The exact dimensions of the top and bottom used here are 13 3/8” x 14”
The sides are 6 5/8” x 14 and the ends are 6 5/8” x 11 7/8”
You can use 12 inch wide MDF shelving but to get the same volume, the length increases to about 17 inches.
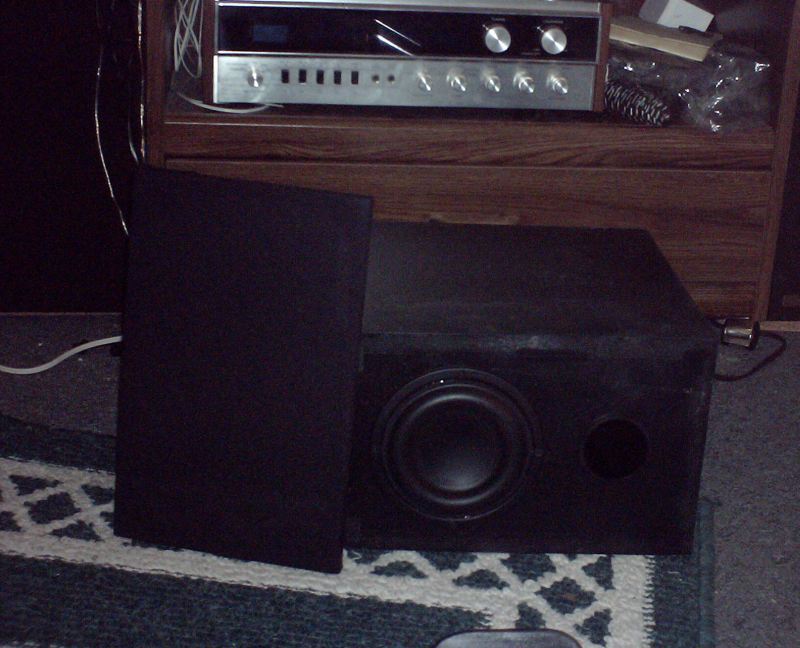
Here is the sub assembled and painted

…and the test run of the finished product doing its thing

Finally, a shot of everything together.

Building a Grille for
the Sub
I built the grille frame from scrap 3/8 inch square poplar stock I had on hand available from the home improvement stores. I measured and cut the frame on my table saw, then glued up the corners using my 45 degree clamps. I cut triangular pieces of 1/8-inch thick 2-inch wide poplar stock and glued these to the corners and claming them in place. These pieces ensure that the frame is square, reinforce the corners, and provide space for Velcro squares that hold the frame in place on the sub.
I painted the frame black, and cut black grille cloth which was then stapled to the frame with ¼ inch long staples.
Here are some photos.


---David L. Debertin